Python
Deploying a Pelican Static Site with GitHub Pages and Cloudflare Pages
This is a detailed deployment note for installing and deploying Pelican: starting with configuring a local Pelican project environment, then pushing it to a GitHub repository, using Cloudflare to trigger and deploy it automatically, binding a domain, and bringing the full production environment online.
On this page
Prerequisites
- Anaconda is installed for Python environment management
- You are familiar with basic Git concepts
- You already have a GitHub account and have created a project repository named
username.github.io - You already have a Cloudflare account
Install and Configure the Local Pelican Project
1. Create a new environment
Use the conda command to create a new installation environment named pelican, and specify a Python version greater than 3.7
# 创建新环境pelican
conda create -n pelican python=3.10

# 激活新环境pelican
conda activate pelican
Create a new project folder for subsequent configuration
mkdir ~/projects/gmlg.comEnter the project folder
cd ~/projects/gmlg.com2. Install Pelican
Install Pelican. It does not support Markdown syntax by default, so specify it during installation:
python -m pip install "pelican[markdown]"If an older version has already been installed before, upgrade Pelican with the following command:
python -m pip install --upgrade pelicanIf you want to improve typography, you can also install the typogrify package:
python -m pip install typogrifyNow run the Pelican quickstart command to enter the interactive configuration interface
pelican-quickstartThe following interaction is for reference:
Welcome to pelican-quickstart v4.8.0.

This script will help you create a new Pelican-based website.

Please answer the following questions so this script can generate the files
needed by Pelican.


> Where do you want to create your new web site? [.] .
> What will be the title of this web site? 国民老公
> Who will be the author of this web site? Xavier Zhang
> What will be the default language of this web site? [en] en
> Do you want to specify a URL prefix? e.g., https://example.com   (Y/n) y
> What is your URL prefix? (see above example; no trailing slash) https://gmlg.com
> Do you want to enable article pagination? (Y/n) y
> How many articles per page do you want? [10] 10
> What is your time zone? [Europe/Rome] Asia/Shanghai
> Do you want to generate a tasks.py/Makefile to automate generation and publishing? (Y/n) y
> Do you want to upload your website using FTP? (y/N) n
> Do you want to upload your website using SSH? (y/N) n
> Do you want to upload your website using Dropbox? (y/N) n
> Do you want to upload your website using S3? (y/N) n
> Do you want to upload your website using Rackspace Cloud Files? (y/N) n
> Do you want to upload your website using GitHub Pages? (y/N) y
> Is this your personal page (username.github.io)? (y/N) y
Done. Your new project is available at /Users/xavier/Projects/gmlg.com
For time zone settings, see: List of tz database time zones
The default theme looks rather ugly, so as a reference, we try downloading a new theme and practicing the related commands. Note that the theme chosen here for practice is Attila (repository URL); after downloading it, extract it to the current project root directory. Install the theme:
pelican-themes -U attila # attila为解压后的主题文件夹Check whether the theme has been installed successfully:
pelican-themes -lThe query result shows that installation succeeded:
simple
attila
notmyidea
Change the theme in pelicanconf.py to attila:
THEME = 'attila'
AUTHOR = 'Xavier'
SITENAME = '国民老公'
SITEURL = ''
Install the Pelican plugin dependencies required by the theme:
python -m pip install pelican-neighbors pelican-webassets pelican-sitemap beautifulsoup4 pelican-readtime # 具体请参考主题仓库中的配置文件Then download the related plugins:
# 在主目录安装插件
git clone --recursive https://github.com/getpelican/pelican-plugins
Okay, at this point we know how to manually install themes and plugins and enable them in the configuration environment. However, the Attila plugin still does not look elegant enough, so for the production deployment we ultimately choose the Papyrus theme on GitHub, which was ported from PaperMod.
Of course, if you really want to use the Attila theme, I recommend referring to Leo’s blog. The blogger’s use of this theme is very worth learning from.
3. Install the Papyrus theme
The theme requires the pelican-search, pelican-neighbors, pelican-readtime, and pelican-toc plugins. The first 3 plugins can be installed with the pip command, while Pelican-toc must be installed manually. In addition, we need to install the two dependencies stork and beautifulsoup4.
python -m pip install pelican-search \
&& python -m pip install pelican-neighbors \
&& python -m pip install pelican-readtime
Create themes and pelican-plugins folders in the project root directory. In the themes folder, clone the Papyrus theme.
mkdir themes \
&& cd themes \
&& git clone https://github.com/aleylara/Papyrus.git
Now clone the pelican-toc plugin repository into the local plugin directory, and install the dependency module beautifulsoup4.
mkdir pelican-plugins \
&& cd pelican-plugins \
&& git clone https://github.com/ingwinlu/pelican-toc.git \
# && git clone https://github.com/jameslittle230/stork.git \
&& python -m pip install beautifulsoup4
The Papyrus theme has search configured already. However, we still need to install the stork package on the local operating system. You can verify whether stork is installed with the command stork -h; if it is not installed, use either of the commands below.
# Install using Homebrew
brew install stork-search/stork-tap/stork

# Install using the Rust toolchain and install Stork with Cargo
cargo install stork-search --locked
If the brew installation fails with Error: Command failed with exit 128: git, the reason is that HomeBrew components homebrew-core and homebrew-cask are not recognized as Git repositories. You can add the following Git global variables and try again:
brew -v  # 根据输出结果的提示,输入下方命令,您的本机目录有可能不同

git config --global --add safe.directory /usr/local/Homebrew/Library/Taps/homebrew/homebrew-core \
&& git config --global --add safe.directory /usr/local/Homebrew/Library/Taps/homebrew/homebrew-cask
In very rare cases, using --add safe.directory still does not help. In that case, you can remove the relevant directories and add them again. Example commands are as follows:
rm -rf /usr/local/Homebrew/Library/Taps/homebrew/homebrew-core \
&& brew tap homebrew/core

rm -rf /usr/local/Homebrew/Library/Taps/homebrew/homebrew-cask \
&& brew tap homebrew/cask
In addition, after Stork is installed successfully, running the stork -h command directly may still say that the stork command cannot be found. At this point, simply link Stork from Brew:
brew link stork4. Configure theme parameters
Next, configure pelicanconf.py to meet the needs of the actual environment. The following example mainly adjusts the configuration file from the official repository as a reference:
AUTHOR = 'Xavier'
SITENAME = '国民老公'
SITEURL = ''
TIMEZONE = 'Asia/Shanghai'
DEFAULT_LANG = 'zh-CN'
SUBTITLE = 'Xavier'
SUBTEXT = '''
一个仍然有望成为<b>国民老公</b>的人。<br>
科技至上主义者,坚信颠覆性创新的力量。<br>
更多信息,可前往 <a class="underline"
href="https://niaodian.com/">鳥電</a> 获取。
'''
COPYRIGHT = '©2023'
PATH = 'content'
THEME = 'themes/Papyrus'
THEME_STATIC_PATHS = ['static']
PLUGIN_PATHS = ['pelican-plugins']
PLUGINS = ['readtime', 'search', 'neighbors', 'pelican-toc']
STATIC_PATHS = [
'images',
'images/favicon.ico',
'extra/robots.txt',
]
EXTRA_PATH_METADATA = {
'extra/robots.txt': {'path': 'robots.txt'},
'images/favicon.ico': {'path': 'favicon.ico'},
}
DISPLAY_PAGES_ON_MENU = True
DIRECT_TEMPLATES = (('index', 'search', 'tags', 'categories', 'archives',))
PAGINATED_TEMPLATES = {'index': None, 'tag': None, 'category': None, 'author': None, 'archives': 24, }
# Site search plugin
SEARCH_MODE = "output"
SEARCH_HTML_SELECTOR = "main"
# Table of Content Plugin
TOC = {
'TOC_HEADERS': '^h[1-3]', # What headers should be included in
# the generated toc
# Expected format is a regular expression
'TOC_RUN': 'true', # Default value for toc generation,
# if it does not evaluate
# to 'true' no toc will be generated
'TOC_INCLUDE_TITLE': 'false', # If 'true' include title in toc
}
# Feed generation is usually not desired when developing
FEED_ALL_ATOM = 'feeds/all.atom.xml'
CATEGORY_FEED_ATOM = None
TRANSLATION_FEED_ATOM = None
AUTHOR_FEED_ATOM = None
AUTHOR_FEED_RSS = None
RSS_FEED_SUMMARY_ONLY = True
# Social widgets 改成您自己的社交账号
SOCIAL = (
('github', 'https://github.com/niaodian'),
('twitter', 'https://twitter.com/niaodian'),
('instagram', 'https://instagram.com/niaodian'),
('telegram', 'https://t.me/niaodian'),
)
# Article share widgets
SHARE = (
("twitter", "https://twitter.com/intent/tweet/?text=Features&url="),
("linkedin", "https://www.linkedin.com/sharing/share-offsite/?url="),
("reddit", "https://reddit.com/submit?url="),
("facebook", "https://facebook.com/sharer/sharer.php?u="),
("whatsapp", "https://api.whatsapp.com/send?text=Features - "),
("telegram", "https://telegram.me/share/url?text=Features&url="),
)
DEFAULT_PAGINATION = 8
# Uncomment following line if you want document-relative URLs when developing
# RELATIVE_URLS = True
# DISQUS_SITENAME = ''
# GOOGLE_ANALYTICS = ''5. Write articles
An article title example is shown below. It is strongly recommended to add the Summary field. It can replace the article description and be added to the HTML metadata . The summary can also be used on the blog homepage. It helps keep article previews at a similar height when there is no title, image, or code block.
Title: Installation
Date: 2023-07-13
Tags: CSS, Markdown, Python, AI
Category: Software
Summary: Lorem ipsum dolor sit amet, consectetuer adipiscing elit. Nullam dignissim convallis est. Quisque aliquam. Donec faucibus. Nunc iaculis suscipit dui. Nam sit amet sem. Aliquam libero nisi, imperdiet at, tincidunt nec, gravida vehicula, nisl.
Articles created inside a directory named pages will have an independent static page and a direct link, similar to the “About” page.
Now you can run the development server and visit http://127.0.0.1:8000/
pelican content \
&& pelican --autoreload --listen --ignore-cache
The final project directory structure looks like this:
$ (pelican) ➜ myProject tree
├── myBlog
│   ├── content
│   │   ├── images
│   │   │   └── camera.png
│   │   ├── pages
│   │   │   ├── about.md
│   │   │   └── events.md
│   │   ├── Hardware
│   │   │   ├── article-one.md
│   │   │   └── article-two.md
│   │   └── Software
│   │       ├── article-three.md
│   │       └── article-four.md
│   ├── Makefile
│   ├── output
│   │
│   ├── pelicanconf.py
│   ├── pelican-plugins
│   │   └── pelican-toc
│   │
│   ├── publishconf.py
│   ├── tasks.py
│   └── themes
│       └── Papyrus
└── venv
6. About image size and position
By adding custom class names in Markdown, such as image-left, image-right, and image-center, you can place images on the page.
Similarly, you can use custom classes image-thumbnail, image-small, image-medium, and image-large to specify the size of placed images.
You can also use the <img/> tag directly in Markdown together with custom image classes.
<img src="/images/screenshot.png" alt="screenshot" class="image-left image-medium" />
<img src="/images/screenshot.png" alt="screenshot" class="image-right image-thumbnail" />

Alternatively you could use inline styling.
<img src="/images/screenshot.png" alt="screenshot" style="width:200px;" />
7. Embed videos
To obtain responsive video thumbnails, in a Markdown document the <iframe> tag must be wrapped in <div class="aspect-w-16 aspect-h-9"></div> in the markup file.
<div class="aspect-w-16 aspect-h-9">
    <iframe width="736" height="414" src="https://www.youtube.com/embed/TmWIrBPE6Bc" title="YouTube video player" frameborder="0" allow="accelerometer; autoplay; clipboard-write; encrypted-media; gyroscope; picture-in-picture" allowfullscreen>
    </iframe>
</div>
8. Tailwind CSS
If you want to make any local changes, the theme also includes a tailwindcss configuration file. First enter the Papyrus directory and use npm install to install the missing packages. Then run the development server, which will watch the tailwind classes you change in the templates folder and update main.css at any time. Remember to install Node.js first.
# Initial installation of packages
$ npm install

# JIT compiled main.css
$ npm run dev
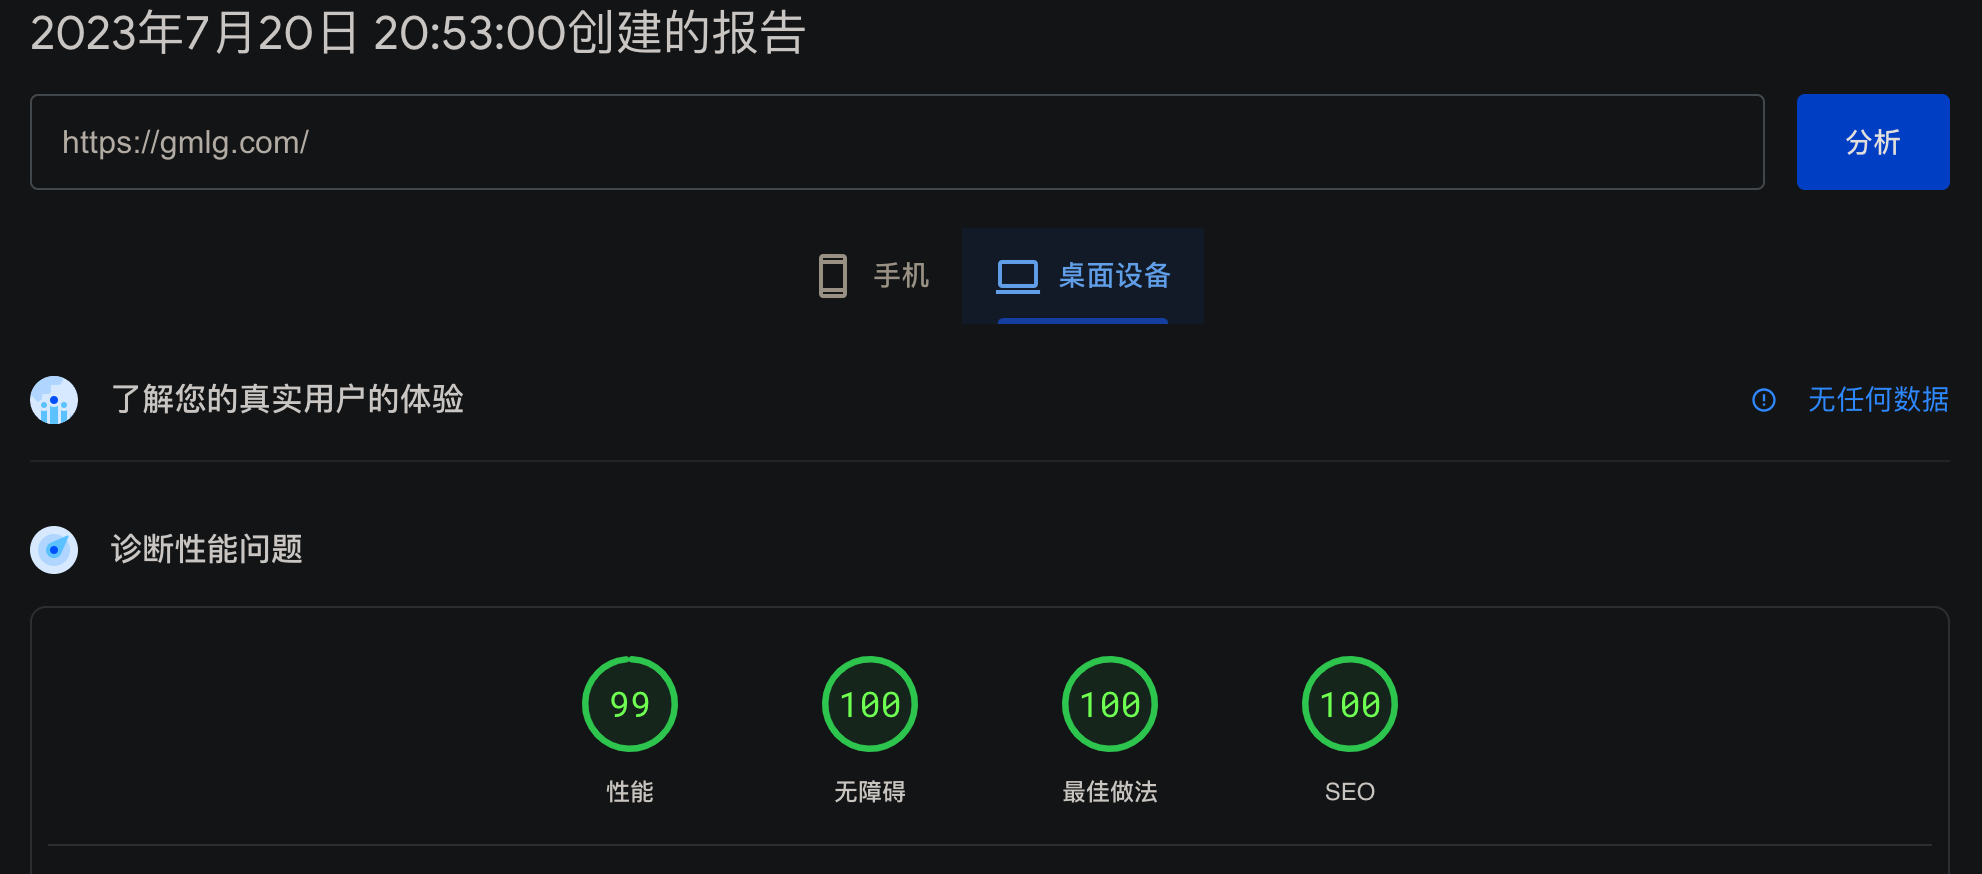
9. Performance and SEO improvements
 Open larger image: pagespeed.png
The settings file now has placeholders for the robots.txt and favicon.ico files. Please note that these files are not included and need to be added by yourself.
├── content
│    ├── extra
│    │    └── robots.txt
│    ├── images
│    │   ├── favicon.ico
│    │   └── camera.png
If you are updating from an older version, make sure your pelicanconf.py has updated EXTRA_PATH_METADATA and STATIC_PATHS, as shown in the example settings above.
Configure the Local Git Environment
If you want to successfully submit the locally deployed Pelican project to a GitHub repository, you need to complete some preparations.
Please note that if you have already completed Git-related configuration, you can skip directly to the Git submission section
1. Configure SSH keys for your GitHub account
You can generate a new SSH key on your local computer. After generating the key, you can add the public key to your account on GitHub.com to enable authentication for Git operations over SSH.
Open the terminal or Git Bash
Paste the text below (replace the email with your GitHub email address)
ssh-keygen -t ed25519 -C "[email protected]"If your system is too old and may not support the Ed25519 algorithm, use the RSA algorithm instead:
ssh-keygen -t rsa -b 4096 -C "[email protected]"Follow the prompts to finish generating the key. In this example, the passphrase is empty.
SSH keys are stored in the
/Users/YOU/.ssh/directory by default. If you do not want to enter a password every time you use the key, you need to add the generated SSH key tossh-agentStart
ssh-agentin the background
$ eval "$(ssh-agent -s)"
> Agent pid 59566
Depending on the environment, you may need to use different commands. For example, before starting ssh-agent, you may need root access by running sudo -s -H, or you may need to use exec ssh-agent bash or exec ssh-agent zsh to run ssh-agent.
- If you are using macOS Sierra 10.12.2 or later, you need to modify the
~/.ssh/configfile to automatically load keys into ssh-agent and store passwords in the keychain.
Check whether the ~/.ssh/config file is in the default location
$ open ~/.ssh/config
> The file /Users/YOU/.ssh/config does not exist.
If the file does not exist, create it
touch ~/.ssh/configOpen the ~/.ssh/config file, then modify the file to include the following lines. If your SSH key file has a different name or path than the example code, modify the filename or path to match your current setup
Host github.com
	AddKeysToAgent yes
	IgnoreUnknown UseKeychain
	# 如果你选择不向密钥添加密码,应该省略 UseKeychain 行。
	# 如果看到 Bad configuration option: usekeychain 错误,请在配置的 Host *.github.com 部分添加额外的一行。
	#UseKeychain yes
IdentityFile ~/.ssh/id_ed25519- Add the SSH private key to ssh-agent and store the password in the keychain. If you created the key with another name, or want to add an existing key with another name, replace ided25519 in the command with the name of the private key file.
ssh-add --apple-use-keychain ~/.ssh/id_ed25519- Add the SSH public key to your account on GitHub.
Copy the SSH public key to the clipboard
pbcopy < ~/.ssh/id_ed25519.pub # 复制 id_ed25519.pub 文件至剪贴板,如果不起作用,可以改用 cat ~/.ssh/id_ed25519.pubVisit SSH and GPG keys and add the new SSH key.
- Test the SSH connection
ssh -T [email protected]If the fingerprint matches, the test is successful: Hi USERNAME! You've successfully authenticated, but GitHub does not provide shell access.
2. Submit the project to the GitHub repository with Git
Configure Git global variables and check the configuration:
git config --global user.name "[username]"
git config --global user.email "[email address]"
# [可选] 启用带帮助的彩色命令行输出
git config --global color.ui auto
# 对于 Windows 用户,建议额外执行下面两条配置
git config --global core.autocrlf true
git config --global core.safecrlf warn

# 检查现在的配置
git config --list
# 获得 config 命令手册
git help config
Because the plugin pelican-plugins/pelican-toc is an external repository, if it is cloned directly, the files in that repository will not be included, which will cause problems later. Therefore, it needs to be installed as a submodule:
git rm --cached pelican-plugins/pelican-toc -f
git rm --cached themes/Papyrus -f

git submodule add https://github.com/ingwinlu/pelican-toc.git pelican-plugins/pelican-toc

git submodule add https://github.com/aleylara/Papyrus.git themes/Papyrus
Before formally starting the submission, we have one more very important step. Run:
pip freeze > requirements.txtIn the local Pelican project folder, initialize Git and commit the project:
# 初始化 Git 仓库
git init

git add .
git commit -m "initial commit"

git branch -M main

# 可以部署至公有或私有仓库,建议始终部署至私有仓库,以避免一旦发生信息泄露而出现无法控制的局面
git remote add origin [email protected]:username/username.github.io.git
git push -u origin main
Here, if you use git push -u origin master, you will receive the following error message:
git push -u origin master

# 结果:
# error: src refspec master does not match any
# error: failed to push some refs to 'github.com:niaodian/xavier.git'
This error can be caused by different reasons. The most likely reason is that the master branch does not exist. Since the default branch in your new repository may be main, there is no master branch when you try to push.
You can use the git branch -v command to display the remote branches connected to the local repository:
git branch -v

# 结果:
# * main b1...28 the first time commit
Use git show-ref to check the refs names and confirm that the issue is indeed caused by the branch name:
git show-ref

# 结果:
# b14a328...5a2a747 refs/heads/main
The solution is to replace the git push origin HEAD:master command with the git push origin HEAD:main command.
Now we can push normally, but then we encounter a new problem: error: failed to push some refs to 'github.com:username/username.github.io.git':
git push -u origin main

# 结果:
# To github.com:username/username.github.io.git
#  ! [rejected]        main -> main (fetch first)
# error: failed to push some refs to 'github.com:username/username.github.io.git'
# hint: Updates were rejected because the remote contains work that you do
# hint: not have locally. This is usually caused by another repository pushing
# hint: to the same ref. You may want to first integrate the remote changes
# hint: (e.g., 'git pull ...') before pushing again.
# hint: See the 'Note about fast-forwards' in 'git push --help' for details.
This message means that the online version has newer content than the files in the current project, so Git blocks our submission. To solve this, we can pull first and then push:
# --rebase 参数表示:内容拉取之后采用rebase方式合并
git pull --rebase

# 结果:
remote: Enumerating objects: 3, done.
remote: Counting objects: 100% (3/3), done.
remote: Compressing objects: 100% (2/2), done.
remote: Total 3 (delta 0), reused 0 (delta 0), pack-reused 0
Unpacking objects: 100% (3/3), 12.40 KiB | 3.10 MiB/s, done.
From github.com:username/username.github.io
 * [new branch]      main       -> origin/main
There is no tracking information for the current branch.
Please specify which branch you want to rebase against.
See git-pull(1) for details.

    git pull <remote> <branch>

If you wish to set tracking information for this branch you can do so with:

    git branch --set-upstream-to=origin/<branch> main
Then submit again:
git push -u origin main

# 如果仍旧报错的话,可以添加 -f 参数进行强制提交。由于强制提交可能会毁坏其他的commit记录,在团队协作项目中应谨慎使用。考虑本例为首次提交,使用 -f 参数可以快速解决问题。
# git push -u origin main -f

# 结果:
Enumerating objects: 43, done.
Counting objects: 100% (43/43), done.
Delta compression using up to 8 threads
Compressing objects: 100% (34/34), done.
Writing objects: 100% (43/43), 27.68 KiB | 4.61 MiB/s, done.
Total 43 (delta 12), reused 0 (delta 0), pack-reused 0
remote: Resolving deltas: 100% (12/12), done.
To github.com:username/username.github.io.git
 + dacc0dc...05d46b0 main -> main (forced update)
branch 'main' set up to track 'origin/main'.
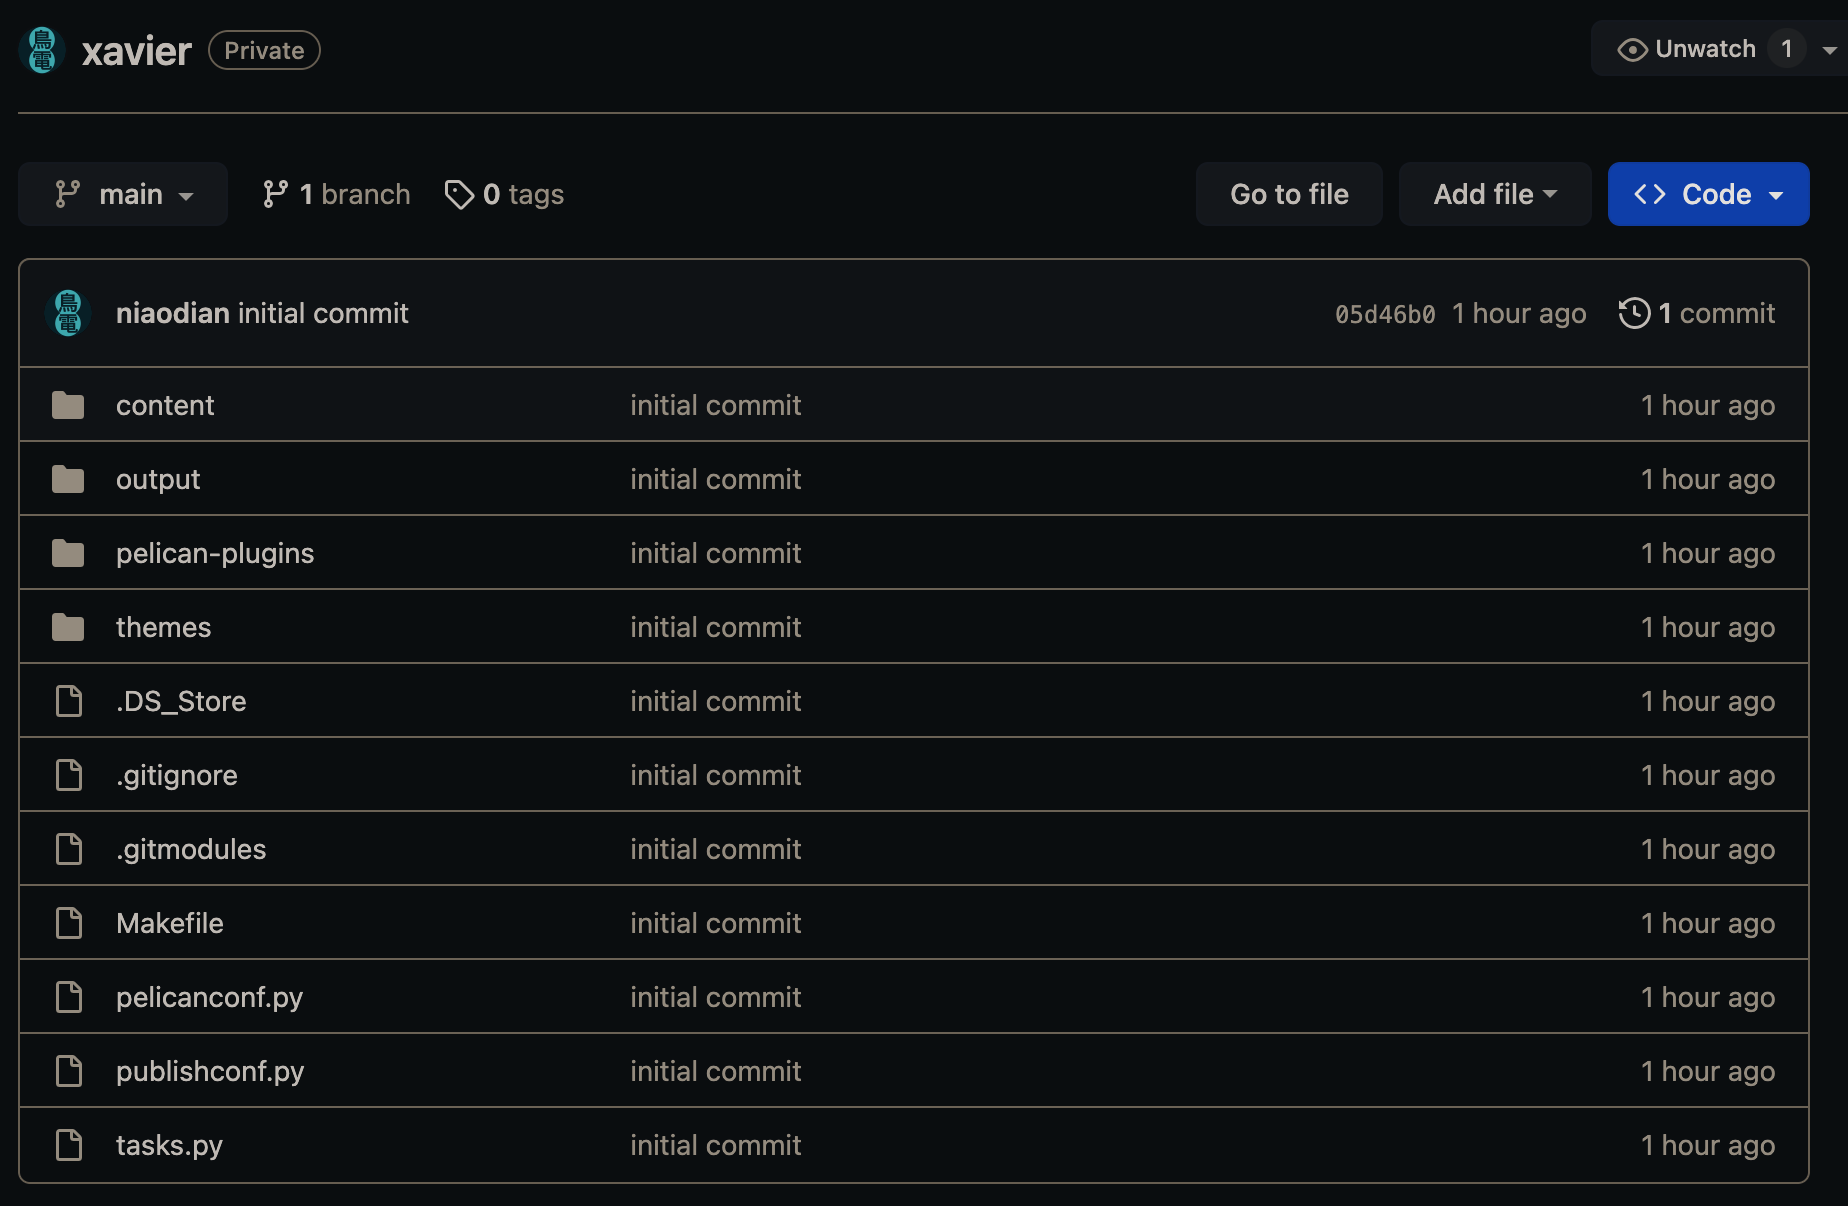
Now, check the online repository and you can see that it has been submitted successfully:
Deploy Online
Deploy the site with Cloudflare Pages
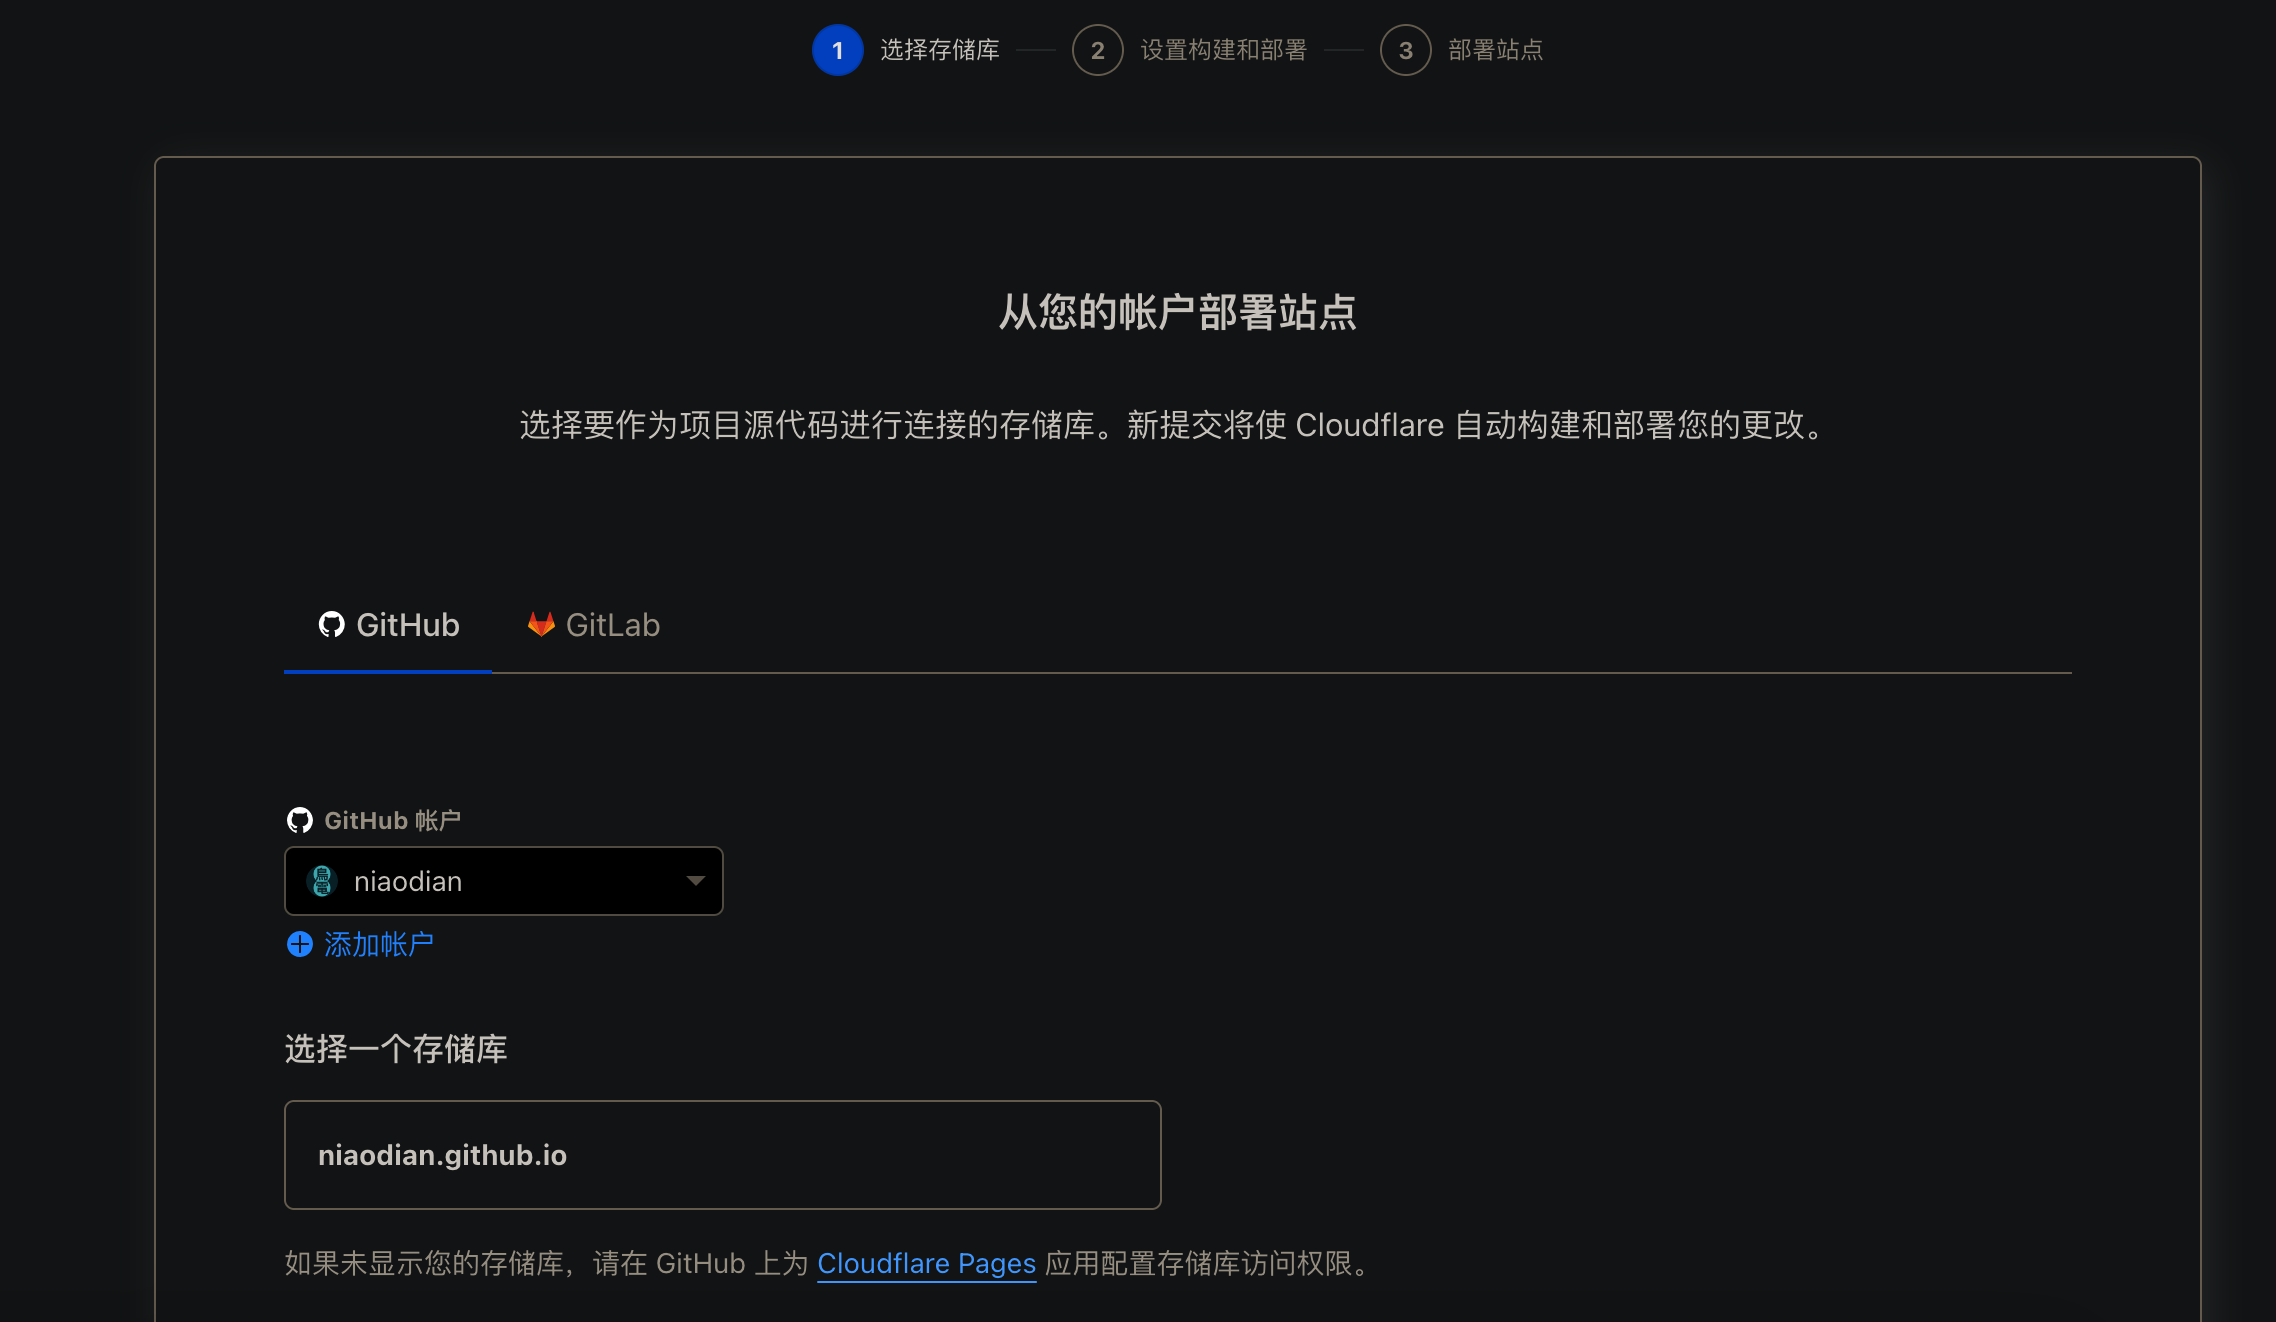
Log in to Cloudflare Dashboard, select Workers和Pages in the left sidebar, and click 创建应用程序 in the upper-right corner.

 Open larger image: image.png
Go to GitHub Apps to configure storage-bucket access permissions.
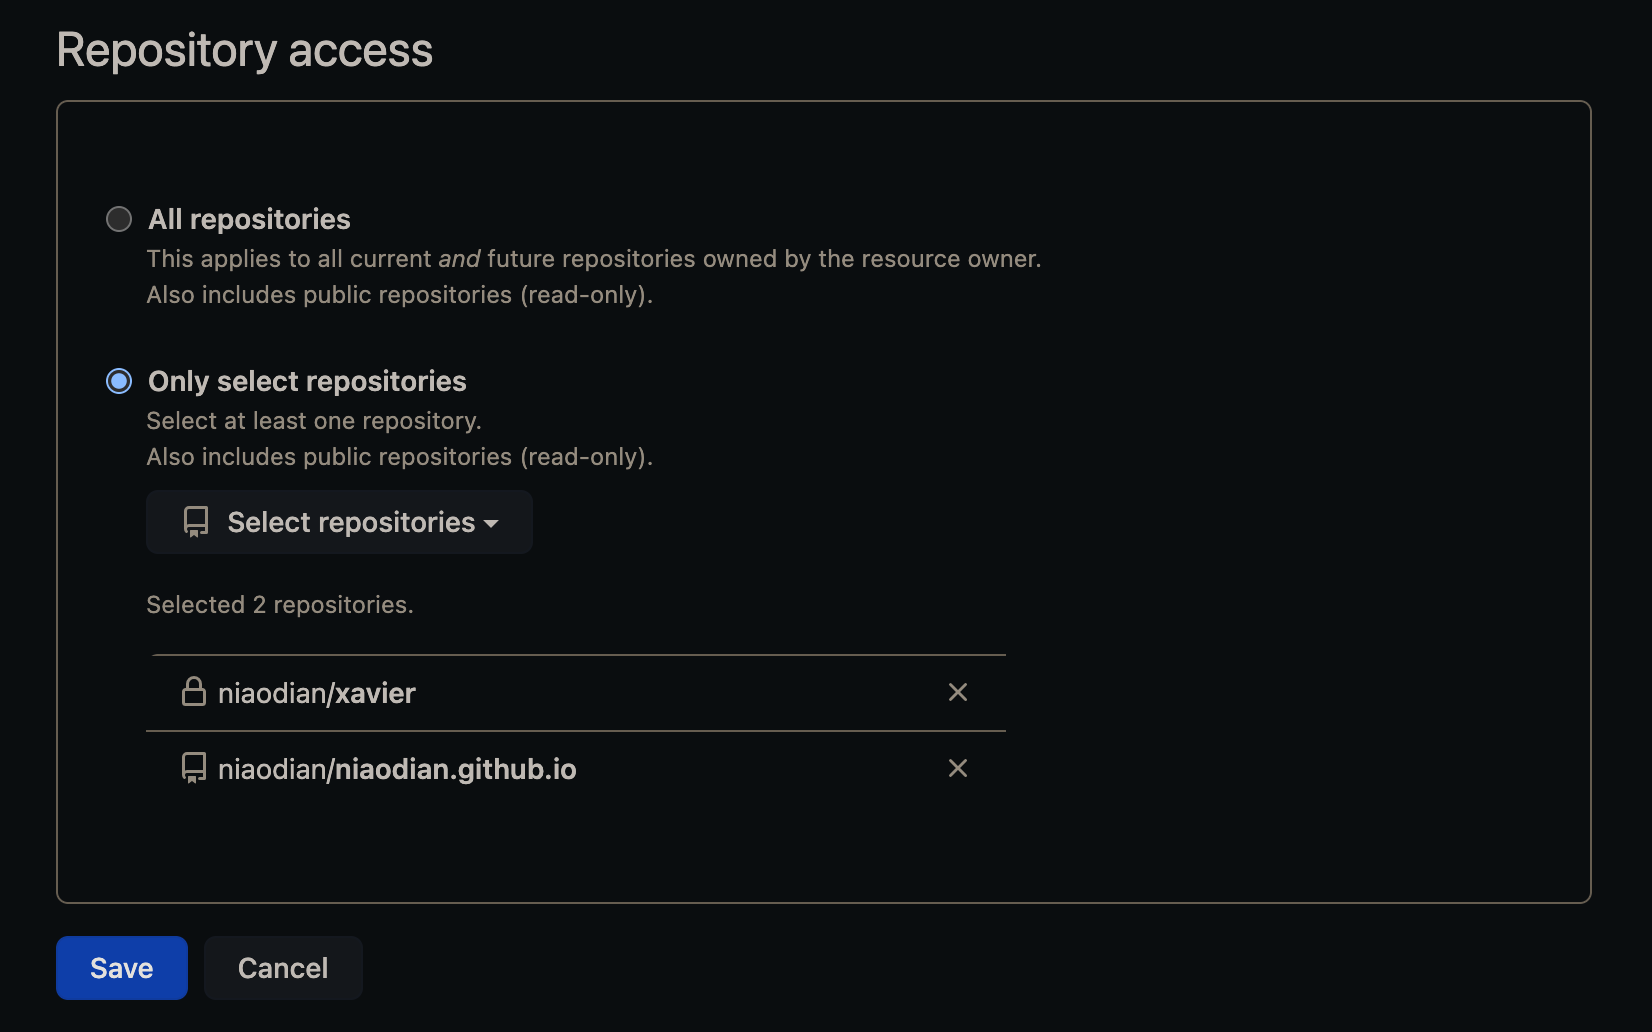
Return to Cloudflare to complete the build and deployment.
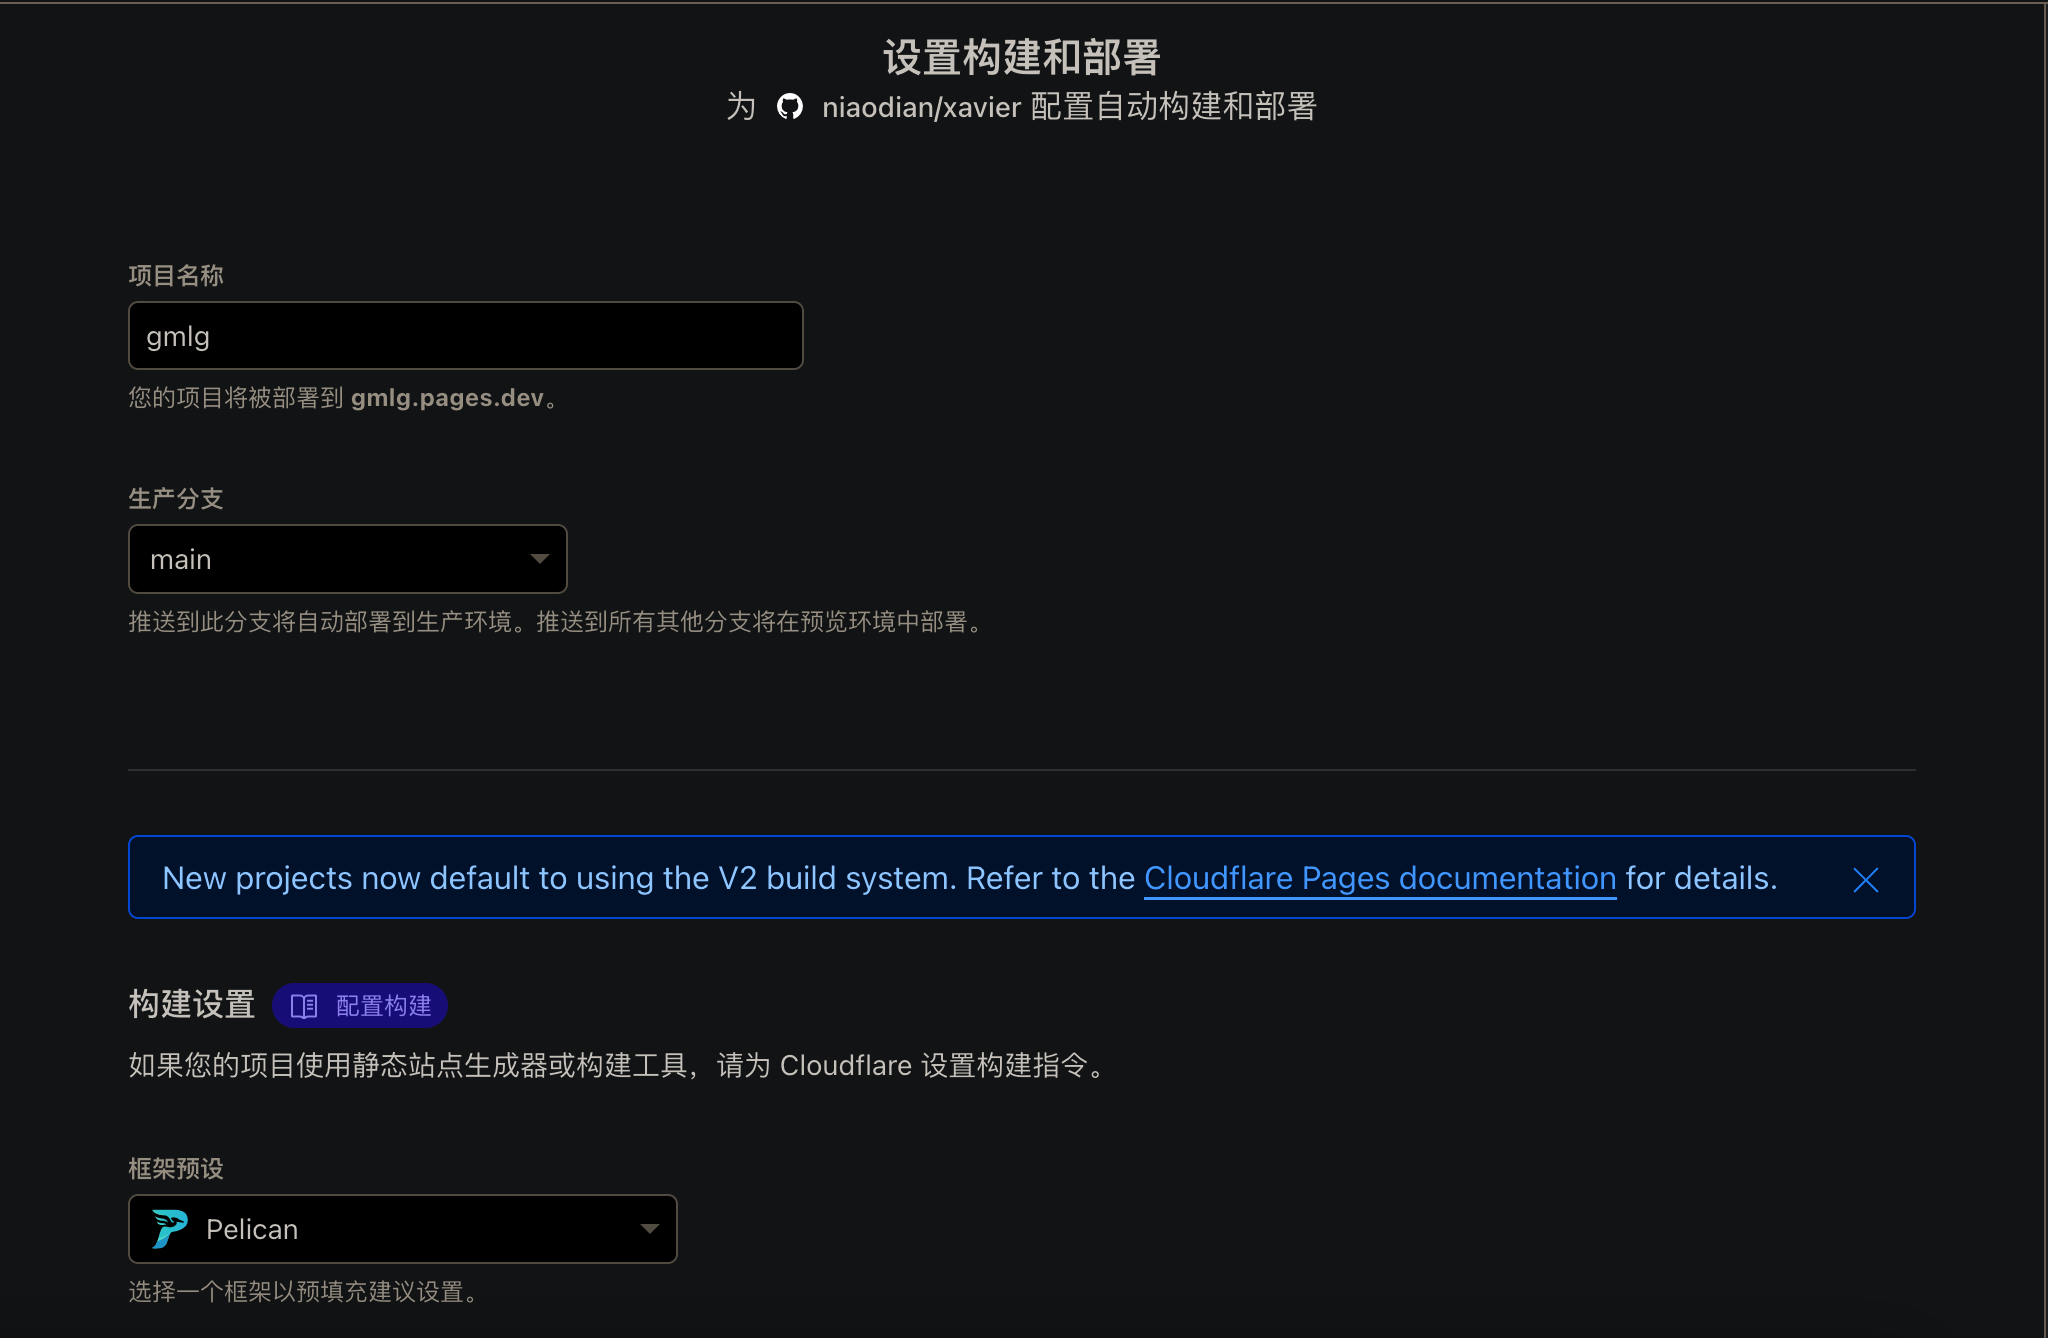
During build and deployment, an error message appears. The reason is that Stork, which we manually installed locally, is not installed during online deployment, so it needs to be installed separately during deployment and added to the system path.
Warning
The Stork installation below ultimately failed. Do not follow these steps :-)
Next, we try installing Stork:
- Go to the NPM website to generate an NPM_TOKEN
- In the Cloudflare deployment project’s settings, add an environment variable with variable name
NPM_TOKENand valuenpm_EHIx...6kJ - Set the build command to
npm run build - Create a new
package.jsonin the project folder and add the deployment command:"scripts": { "build": "npm install stork-search && wget -O /usr/local/bin/stork https://files.stork-search.net/releases/v1.6.0/stork-ubuntu-20-04 && chmod +x /usr/local/bin/stork && pelican content" }, - Use Git commands to push to the main branch, and Cloudflare will automatically start deployment
Actual testing shows that because of permission restrictions, although the method above can download Stork successfully, invoking Stork during execution produces a Permission denied error, so the deployment still cannot succeed.
Note
Alternative solution
After running the pelican content command in the local environment, the static pages generated in the output folder already have full search functionality. Therefore, in practice, we only need to deploy the contents of the output folder to Cloudflare; there is no need to build the entire Pelican production environment from 0 again.
Based on this idea, we can add a new branch to the project repository username.github.io, named gh-pages, push the contents of the output folder to that branch, and then select the gh-pages branch in Cloudflare Pages for deployment.
Note that the framework preset, build command, and build output directory in build settings can all be left blank.
Finally, bind the custom domain to complete the deployment.
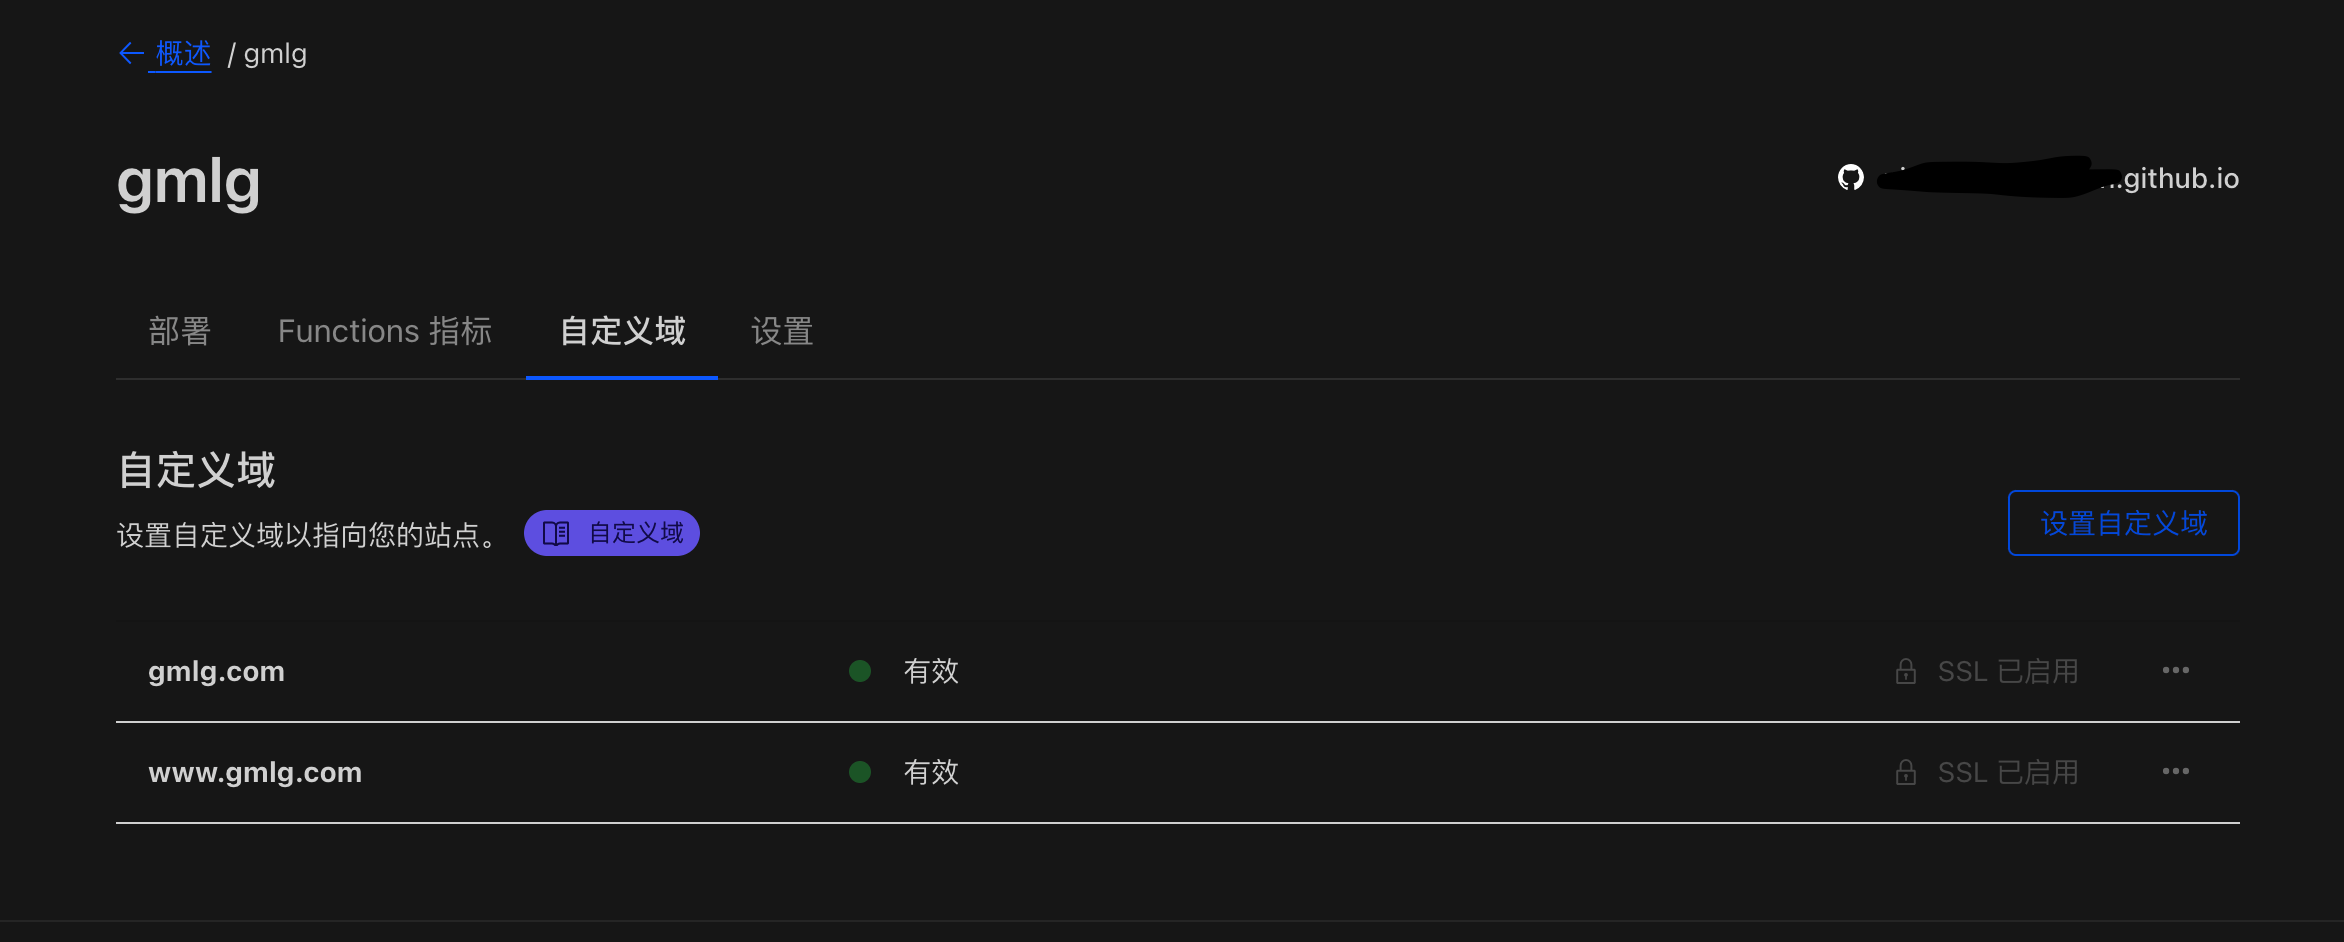
Done. Time to celebrate~
Summary
This note is a detailed record of exploring how to deploy a static blog with Pelican. For many technically oriented readers, the tutorial may be too basic. Even so, I believe it still has some reference value for many non-programming readers who are encountering Python and Pelican for the first time. During the deployment process, the author indeed encountered many odd issues. In particular, during the Cloudflare Pages deployment process, the failed Stork installation caused a great deal of time to be spent looking for a solution. Although it could not ultimately be solved completely, an alternative solution was found. If any reader has found a successful installation method, you are also welcome to share your practical experience. Thank you all!
References:
- Papyrus
- How did I build my personal blog?
- Generating a new SSH key and adding it to the ssh-agent
- Message ‘src refspec master does not match any’ when pushing commits in Git
- Scenario: why does pushing sometimes fail?
- Deploy a Pelican site
- Install private packages
- Use GitHub Actions to automatically deploy GitHub Pages generated by Pelican