Misc
Outrageous: The Obsidian Notes Disappearing Act Caused by NextCloud Sync
It has been nearly half a month since the last update. It was not that I did not want to write, but that I ran into some trouble. The self-hosted NextCloud sync-and-backup setup I had been using went wrong and at one point caused all my Obsidian notes to disappear, including every article here!
On this page
How It Started
Friends who know me may know that I have long used Oracle OCI instances to self-host some everyday internet services for my own use. The 4-core, 24G ARM instance provided by Oracle does indeed perform very well, and with Docker, Traefik, and Portainer, it is very convenient to manage all kinds of services.
Of course, precisely because it is so convenient, enabling services is often very simple and direct, and I tend not to think too much about global dependency relationships. Later, as more and more containers were running under Docker, I gradually began to notice some uncertainty in existing services.
For example, in the docker-compose.yml file, I had previously not specified the internal IP address of each container. This meant that every time the docker daemon was restarted or the machine was rebooted, containers would automatically obtain internal IPs according to their random startup order. Usually this was fine and did not cause major problems. The reason it became a problem was that the WordPress deployed on the instance needed an additional extra_hosts setting pointing to Traefik’s internal IP address to avoid the error “Your site could not complete a loopback request” (that is another story, and I may discuss it in detail another time). Since the contents of extra_hosts are not suitable for changing every time, the idea that came to mind was to fix Traefik’s IP under a custom Network.
That was the original, simplest idea.
In fact, there was nothing wrong with that idea at all.
The problem is that I always can’t resist tinkering when there is no need. Who could withstand that!
So let’s carefully reconstruct how I led myself step by step into the pit. I hope I can take this as a warning in the future: be careful when alone! Be careful when alone! Be careful when alone!
Reconstructing the Story
Several months had passed since I last deployed NextCloud. I had been using it for sync and backup across multiple end devices and felt pretty good about it—so good that I directly put all my notes and some very important files into it.
To be honest, NextCloud’s product features and performance are quite good, and multi-device sync is very smooth. It was just that before going through this trouble, I had not realized that NextCloud is actually only sync software and cannot be used as a backup system. Precisely because I had not formed the correct understanding, I rashly assumed that as long as the files on my local device were still there, they would definitely be automatically synced to the server side.
So in the end, this was really a problem caused by misunderstanding.
Then what exactly did I do that almost led to tragedy? The steps were as follows. If any one of them had not been done, the Obsidian notes disappearing act probably would not have happened:
- I rewrote NextCloud’s
docker-compose.ymlfile and specified internal IPs in the Network; - A sudden thought occurred to me: since I was going to bring the containers up again anyway, why not upgrade while I was at it? So I ran
sudo docker compose down, and while I was at it, I removed the images too. After all, I could pull the latest version again—what was there to fear? - So I ran
sudo docker image prune -f -a; delete them, delete them, delete them all; - Since the images were gone, should I also delete the locally persisted container data? After all, once it synced again later, it would upload the local files to the server. That would also avoid leaving a pile of versioned files on the server taking up space, which would not do. So I steeled myself, and once the mighty
rmcame out, you know what happened—whoosh; - All right, after doing all this, it was time to witness a miracle. I quickly ran
sudo docker compose upto see whether the containers came up normally. Hey, guess what? It worked! Damn, I really am a genius! - Then I quickly visited the domain and configured the administrator account. Heh heh, clever as I am, I naturally set the username and password to the same as before, so wouldn’t it sync directly afterward? Genius, truly a genius idea! Clever me, oh yeah! I logged into the web interface right away. Not bad, everything was normal, except that in the admin settings the external storage section still said “smbclient” was not installed and could not mount “SMB/CIFS”, “SMB/CIFS using OC login”; contact the administrator to install it. Small problem, fix it (see the reflection section below for the detailed method);
- After successfully mounting external storage, I checked the logs. Everything was smooth. Good—then let the containers stay resident in the background:
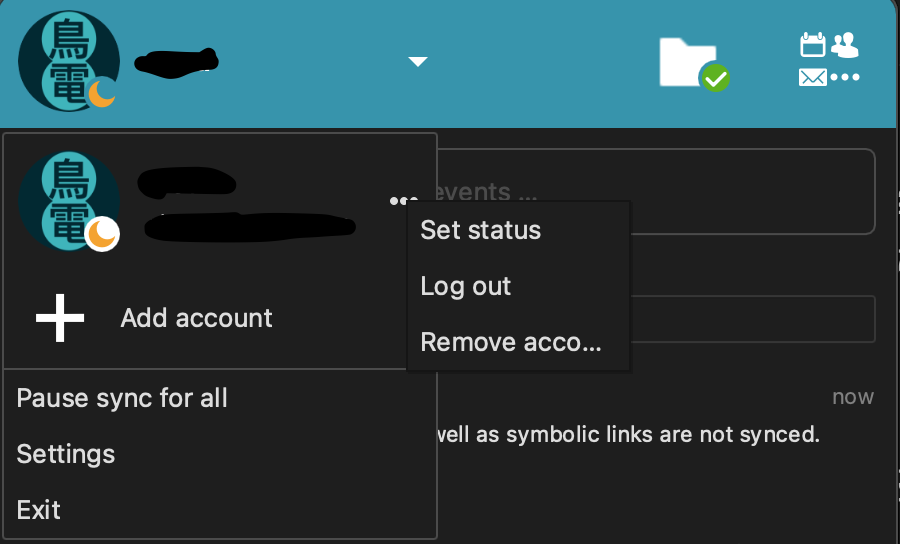
sudo docker compose down && sudo docker compose up -d. Everything was basically done, so it was time to configure the client; - Here is where it got exciting. The client on my MacBook had previously been logged in, but now it showed a connection error. I opened the account and saw that even the avatar was greyed out. So I clicked the three dots next to the account, thinking that it looked like I would have to log in again after all. Therefore, I did not choose Remove account, but clicked Log out. After re-entering the account information (and even specifically regenerating an app password), wow, it logged in successfully right away. I was secretly pleased—sure enough, it was reliable! Then I opened Settings and saw that the sync folders from before were still there, and the app icon in the status bar also began showing that it was syncing;
- Nice, nice. It looked like everything would be fully synced before long. That’s me—so efficient, absolutely top-notch! Hahaha;
- A few seconds later, syncing finished! At that moment, I faintly felt that something seemed wrong. My local notes were at least over a hundred megabytes, so how could it be that fast???
Then I opened the sync log, and sure enough, it was a tragedy: everything was file deletion messages……
So I went to Finder to check. What was going on??? Except for the 3 notes currently being edited in Obsidian, every other file in all synced folders was gone! I quickly opened Trash to check, and there was nothing there either!
I panicked. I really panicked. I was stunned.
I immediately searched and found that people on the official forum had encountered similar situations. Someone even replied to everyone that NextCloud is only a sync tool, not a backup tool. A newly started container has no files on the server side, so it thinks other devices should sync with the server side as well. Then it starts a killing spree, and the files on the computer are directly deleted without even asking you and without going into the trash. The great Obsidian notes disappearing act was staged just like that.
It felt like my heart had turned to ashes.
All roads lead to Rome, but you just had to choose—uh—a waterway?
However, a determined genius cannot be defeated. Who says a waterway cannot reach Rome?
Now I am using it properly again after all. A false alarm, a false alarm.
Backup, Backup, and Still Backup!
Do not panic when things happen. First, give yourself a good slap.
The process of recovering the notes was relatively simple. The truly difficult part is that I cannot clearly remember which important files were lost; they really just disappeared like that. The only reason I could recover the notes was that they are what I use most often, they were synced most promptly across devices, and I also had a habit of regular backups, such as regularly merging them into iCloud. After all, the most convenient way to sync Obsidian on the iPad is still to use iCloud, so I had developed this periodic backup habit. Unfortunately, some recent notes were still lost, but things in the world are rarely perfect. Keep a normal heart, keep a normal heart.
Beyond syncing, backup is an indispensable step.
I originally wanted to share a feasible backup plan in this article, but the focus here is to emphasize the catastrophic consequences of confusing sync with backup, so I will not expand on it for now. If there is an opportunity later, I will write a separate article to share it.
Lessons Learned
1. About Docker Container Networks
Docker’s network configuration is actually very feature-rich. Simply put, a network is a layer that allows services to communicate with one another.
Through the networks element, you can configure named networks that can be reused across multiple services. To use a network across multiple services, each service must be explicitly granted access through the networks attribute. The networks element also has other syntax that provides finer-grained control.
First, let’s look at a simple example:
services:
  proxy:
    build: ./proxy
    networks:
      - frontend
  app:
    build: ./app
    networks:
      - frontend
      - backend
  db:
    image: postgres
    networks:
      - backend

networks:
  frontend:
    # Use a custom driver
    driver: custom-driver-1
  backend:
    # Use a custom driver which takes special options
    driver: custom-driver-2
    driver_opts:
      foo: "1"
      bar: "2"
This Docker Compose configuration file describes a multi-container application that includes a proxy service proxy, an application service app, and a database service db. These services use different networks to isolate their communications. In the services section, the proxy and db services are isolated because they do not share a network. Only app can talk to both. The frontend network is used to connect the proxy and the application, while the backend network is used to connect the application and the database. In addition, the lower networks: section uses custom network drivers and options to configure the behavior of the networks.
Relatively speaking, the contents of the services section are very easy to understand. But the networks: section has a rather complex system of attributes that helps us finely control the network environment inside containers.
2. Attributes of Docker Networks
Before talking about Docker network attributes, we first need to clearly understand Docker’s 3 default networks.
Use docker network ls to view Docker network information on the server. By default it should look something like this:
$ docker network ls
NETWORK ID          NAME                DRIVER              SCOPE
1befe23acd58        bridge              bridge              local
726ead8f4e6b        host                host                local
ef4896538cc7        none                null                local
The output above shows that the bridge network is associated with the bridge driver. It is worth noting that networks and drivers are connected, but they are not the same thing. In this example, the network and driver have the same name, but they are not identical! The output above also shows that the bridge network’s scope is local. This means the network only exists on this Docker host. This is true for all networks using the bridge driver—the bridge driver provides single-host networking.
The differences among these 3 networks are as follows:
- bridge - the
bridgenetwork is the default network for new containers. Unless a different network is specified, all new containers will connect to this network. - host - uses the host’s network stack.
- none - disables networking.
The syntax for using built-in networks such as host and none differs from custom networks because these networks are implicit outside the scope of Compose. To use them, you must define an external network named host or none, along with an alias that Compose can use (hostnet and nonet in the examples below), and then grant services permission to access that network through the alias. Examples:
services:
  web:
    networks:
      hostnet: {}

networks:
  hostnet:
    external: true
name: hostservices:
web:
...
networks:
nonet: {}
networks:
nonet:
external: true
name: noneAfter understanding these characteristics of the default networks, let’s look at the meanings of Docker network attributes:
- driver: specifies the driver this network should use. If no available driver exists on the platform, Compose returns an error message.
- driver_opts: specifies a set of key-value options to pass to the driver. These options depend on the driver. See the driver documentation for more information.
- attachable: if
attachableis set totrue, standalone containers should be able to attach to this network in addition to services. If a standalone container attaches to the network, it can communicate with services and other standalone containers that are also attached to the network. - enable_ipv6: enables an IPV6 network.
- external: if set to
true,externalspecifies that the lifecycle of this network is maintained outside the application. Compose will not attempt to create these networks; if the network does not exist, it returns an error. In addition, all other attributes except the name are irrelevant. If Compose detects any other attributes, it rejects the Compose file as invalid. - ipam: ipam specifies custom IPAM configuration. It is an object containing multiple attributes, each optional. See ipam for details.
- internal: when
internalis set totrue, an externally isolated network can be created. - labels: use labels to add metadata to containers. You can use either an array or a dictionary. Reverse DNS notation is recommended to prevent label conflicts with labels used by other software. See labels for an example.
- name:
namesets a custom name for the network. The name field can be used to reference networks containing special characters. It can also be combined with theexternalattribute to define the platform network that Compose should retrieve, usually by setting it to some parameter.
Next, let’s look at how it works in practice.
3. Configuring Containers to Use Fixed IPs
Returning to the starting point of the story: configuring fixed IPs for Docker containers. Here we use the NextCloud configuration as an example.
The docker-compose.yml file used in this story is as follows:
version: '3'

services:
  nextcloud:
    image: nextcloud:apache
    container_name: nextcloud
    hostname: nextcloud
    restart: always
    ports:
      - 127.0.0.1:8888:80
      - 127.0.0.1:8443:443
    volumes:
      - ./nc_data:/var/www/html
      - /onedrive:/data/onedrive    # 数据持久化也映射 Rclone 网盘,方便挂载
    links:
      - db-nc
    depends_on:
      - redis-nc
      - db-nc
    networks:
      proxy:
        ipv4_address: 172.18.0.8
#        ipv6_address: 2001:3984:3989::10
    environment:
      - REDIS_HOST=redis-nc
      - APACHE_PORT=11000
      - APACHE_IP_BINDING=0.0.0.0
      - MYSQL_HOST=db-nc
      - MYSQL_DATABASE=database    # 不建议明文,可以使用docker secrets配置
      - MYSQL_USER=user            # 不建议明文,可以使用docker secrets配置
      - MYSQL_PASSWORD=pass        # 不建议明文,可以使用docker secrets配置
    labels:
      - traefik.enable=true
      - traefik.docker.network=proxy
      - traefik.http.routers.nextcloud.entrypoints=websecure
      - traefik.http.routers.nextcloud.rule=Host(`nc.yourname.com`)
      - traefik.http.routers.nextcloud.middlewares=default@file
      - traefik.http.routers.nextcloud.middlewares=error-pages

  redis-nc:
    image: redis:alpine
    container_name: redis-nc
    hostname: redis-nc
    restart: always
    networks:
      proxy:
        ipv4_address: 172.18.0.99
#        ipv6_address: 2001:3984:3989::10
    expose:
      - 6378

  db-nc:
    image: mariadb:10.5
    container_name: db-nc
    hostname: db-nc
    command: --transaction-isolation=READ-COMMITTED --binlog-format=ROW
    restart: always
    volumes:
      - ./db_data:/var/lib/mysql
    networks:
      proxy:
        ipv4_address: 172.18.0.9
#        ipv6_address: 2001:3984:3989::10
    environment:
      - MYSQL_DATABASE=database   # 不建议明文,可以使用docker secrets配置
      - MYSQL_USER=user           # 不建议明文,可以使用docker secrets配置
      - MYSQL_ROOT_PASSWORD=pass  # 不建议明文,可以使用docker secrets配置
      - MYSQL_PASSWORD=pass       # 不建议明文,可以使用docker secrets配置
    expose:
      - 127.0.0.1:3306:3306

volumes:
  db_data:
  nc_data:

networks:
  proxy:
    external: true
    # 下面的字段仅为对 Docker 网络属性标签使用的示例,
    # 当 external 设置为 true 时,
    # Compose 并不会实际执行下方的属性标签。
    ipam:
      driver: default     # 单机版默认为 bridge,Swarm 版默认为 overlay
      config:
        - subnet: "172.18.0.0/16"   # subnet 也可在创建网络时指定
#        - subnet: "2001:3984:3989::/64"
The configuration file as a whole is still very simple and clear. You would never expect that even this could trigger a great Obsidian notes disappearing act.
Here, under services, simply specify the network IP for each service. The lower networks section does not even need to be changed (I added some labels above to help everyone better understand Docker network attributes).
Of course, if multiple networks are involved, there are also things to note about how, under services, the networks labels are written for each service. In docker-compose.yml, label parameters can be written in 2 ways: Listing and Mapping.
Under the same label, only one style of parameter writing can be used. Mixing them will cause Compose to report an error. Simply put:
# Listing正确写法示例:
    networks:
      - default
      - proxy

# Mapping正确写法示例(注意网络名是以冒号结尾):
    networks:
      default:
      proxy:
        ipv4_address: 172.18.0.99
        ipv6_address: 2001:3984:3989::10

# 错误示例:
    networks:
      - proxy:
        ipv4_address: 172.18.0.99
        ipv6_address: 2001:3984:3989::10

# 错误示例:
    networks:
      - default
      proxy:
        ipv4_address: 172.18.0.99
        ipv6_address: 2001:3984:3989::10
Details often require particular attention.
4. Some Issues You May Encounter with the NextCloud Container
a. Client login failure
When logging in with the client, you may encounter the problem The polling URL does not start with HTTPS despite the login URL started with HTTPS. Login will not be possible because this might be a security issue. Please contact your administrator. The solution is as follows:
# 找到config.php文件:
cd ~/nc_data/config

# 编辑config.php文件
sudo nano config.php
Then:
# 更新及添加这部分:
  'overwrite.cli.url' => 'https://nc.yourname.com',
  'overwritehost' => 'nc.yourname.com',
  'overwriteprotocol' => 'https',
b. Mounting external storage
Install smbclient in Docker (you have to do it again every time the machine or container service restarts, which is extremely annoying, though fortunately the already mounted cloud drives remain mounted):
# 查看nextcloud實例的名稱
sudo docker ps

# 進入nextcloud的docker容器,nextcloud为容器名
sudo docker exec -it nextcloud bash

# 切換為容器內的root用戶,更新apt-get倉庫
apt-get update

# 安裝smbclient
apt-get install smbclient libsmbclient-dev

# 安裝smbclient的php擴展
pecl install smbclient

# 啟用smbclient
docker-php-ext-enable smbclient

# 隨後退出容器,重啟docker和守护进程即可
sudo systemctl restart docker
sudo systemctl daemon-reload
Even after installing smbclient, when mounting an Rclone remote disk that has already been mapped locally, you still cannot successfully add it to external storage in the backend, because the disk outside the container has not been mapped into the container. An additional mount is required.
# 参考docker-compose.yml文件,已在volume挂载
    volumes:
      - ./nc_data:/var/www/html
      - /onedrive:/data/onedrive
c. After Docker re-pulls the latest NextCloud image, Security & setup warnings show missing database indexes
Error message:
The database is missing some indexes. Since adding indexes on big tables could take some time, they were not added automatically. By running “occ db:add-missing-indices”, those missing indexes could be added manually while Nextcloud keeps running. Once the indexes are added, queries to those tables are usually much faster.
- Missing index “systag_by_tagid” in table “oc_systemtag_object_mapping”.
- Missing index “textstep_session” in table “text_steps”.
Handling steps:
# 进入容器的bash命令行
sudo docker exec -it nextcloud bash
# 参考官方指南进行修复
su www-data -s /bin/bash -c  'php occ db:add-missing-indices'
The output is as follows:
root@xxxxxxxxx:/var/www/html# su www-data -s /bin/bash -c  'php occ db:add-missing-indices'
Check indices of the share table.
Check indices of the filecache table.
Check indices of the twofactor_providers table.
Check indices of the login_flow_v2 table.
Check indices of the whats_new table.
Check indices of the cards table.
Check indices of the cards_properties table.
Check indices of the calendarobjects_props table.
Check indices of the schedulingobjects table.
Check indices of the oc_properties table.
Check indices of the oc_jobs table.
Check indices of the oc_direct_edit table.
Check indices of the oc_preferences table.
Check indices of the oc_mounts table.
Check indices of the oc_systemtag_object_mapping table.
Adding systag_by_tagid index to the oc_systemtag_object_mapping table, this can take some time...
oc_systemtag_object_mapping table updated successfully.
Adding additional textstep_session index to the oc_text_steps table, this can take some time...
oc_text_steps table updated successfully.
5. NextCloud Is a Sync Tool, Not a Backup Tool!
Syncing without backup is simply dancing on the edge of a knife—thrilling indeed!
I really do not have the energy to keep writing about backup tools. By this point I have already written more than 1 ten-thousand and 2 thousand Chinese characters.
Enough, enough. Staying alive matters. I’m out, I’m out.
Conclusion
Honestly, this incident seriously taught me a lesson. I had not developed good data backup habits before, and I never felt that self-use services needed much attention to stability. The mindset that I could do whatever I wanted because I was the only user should stop. In fact, for a single user, the need for data safety is often even more prominent; one careless move and the entire army is wiped out, leaving you with nowhere even to cry.
May you all take this as a warning.
Finally, let’s talk about something happy. Since Apple’s event on Tuesday, Apple Watch Ultra 2 reservations finally opened. I completed my reservation on the subway this morning, and now I am just waiting to receive it next Friday. Happy!
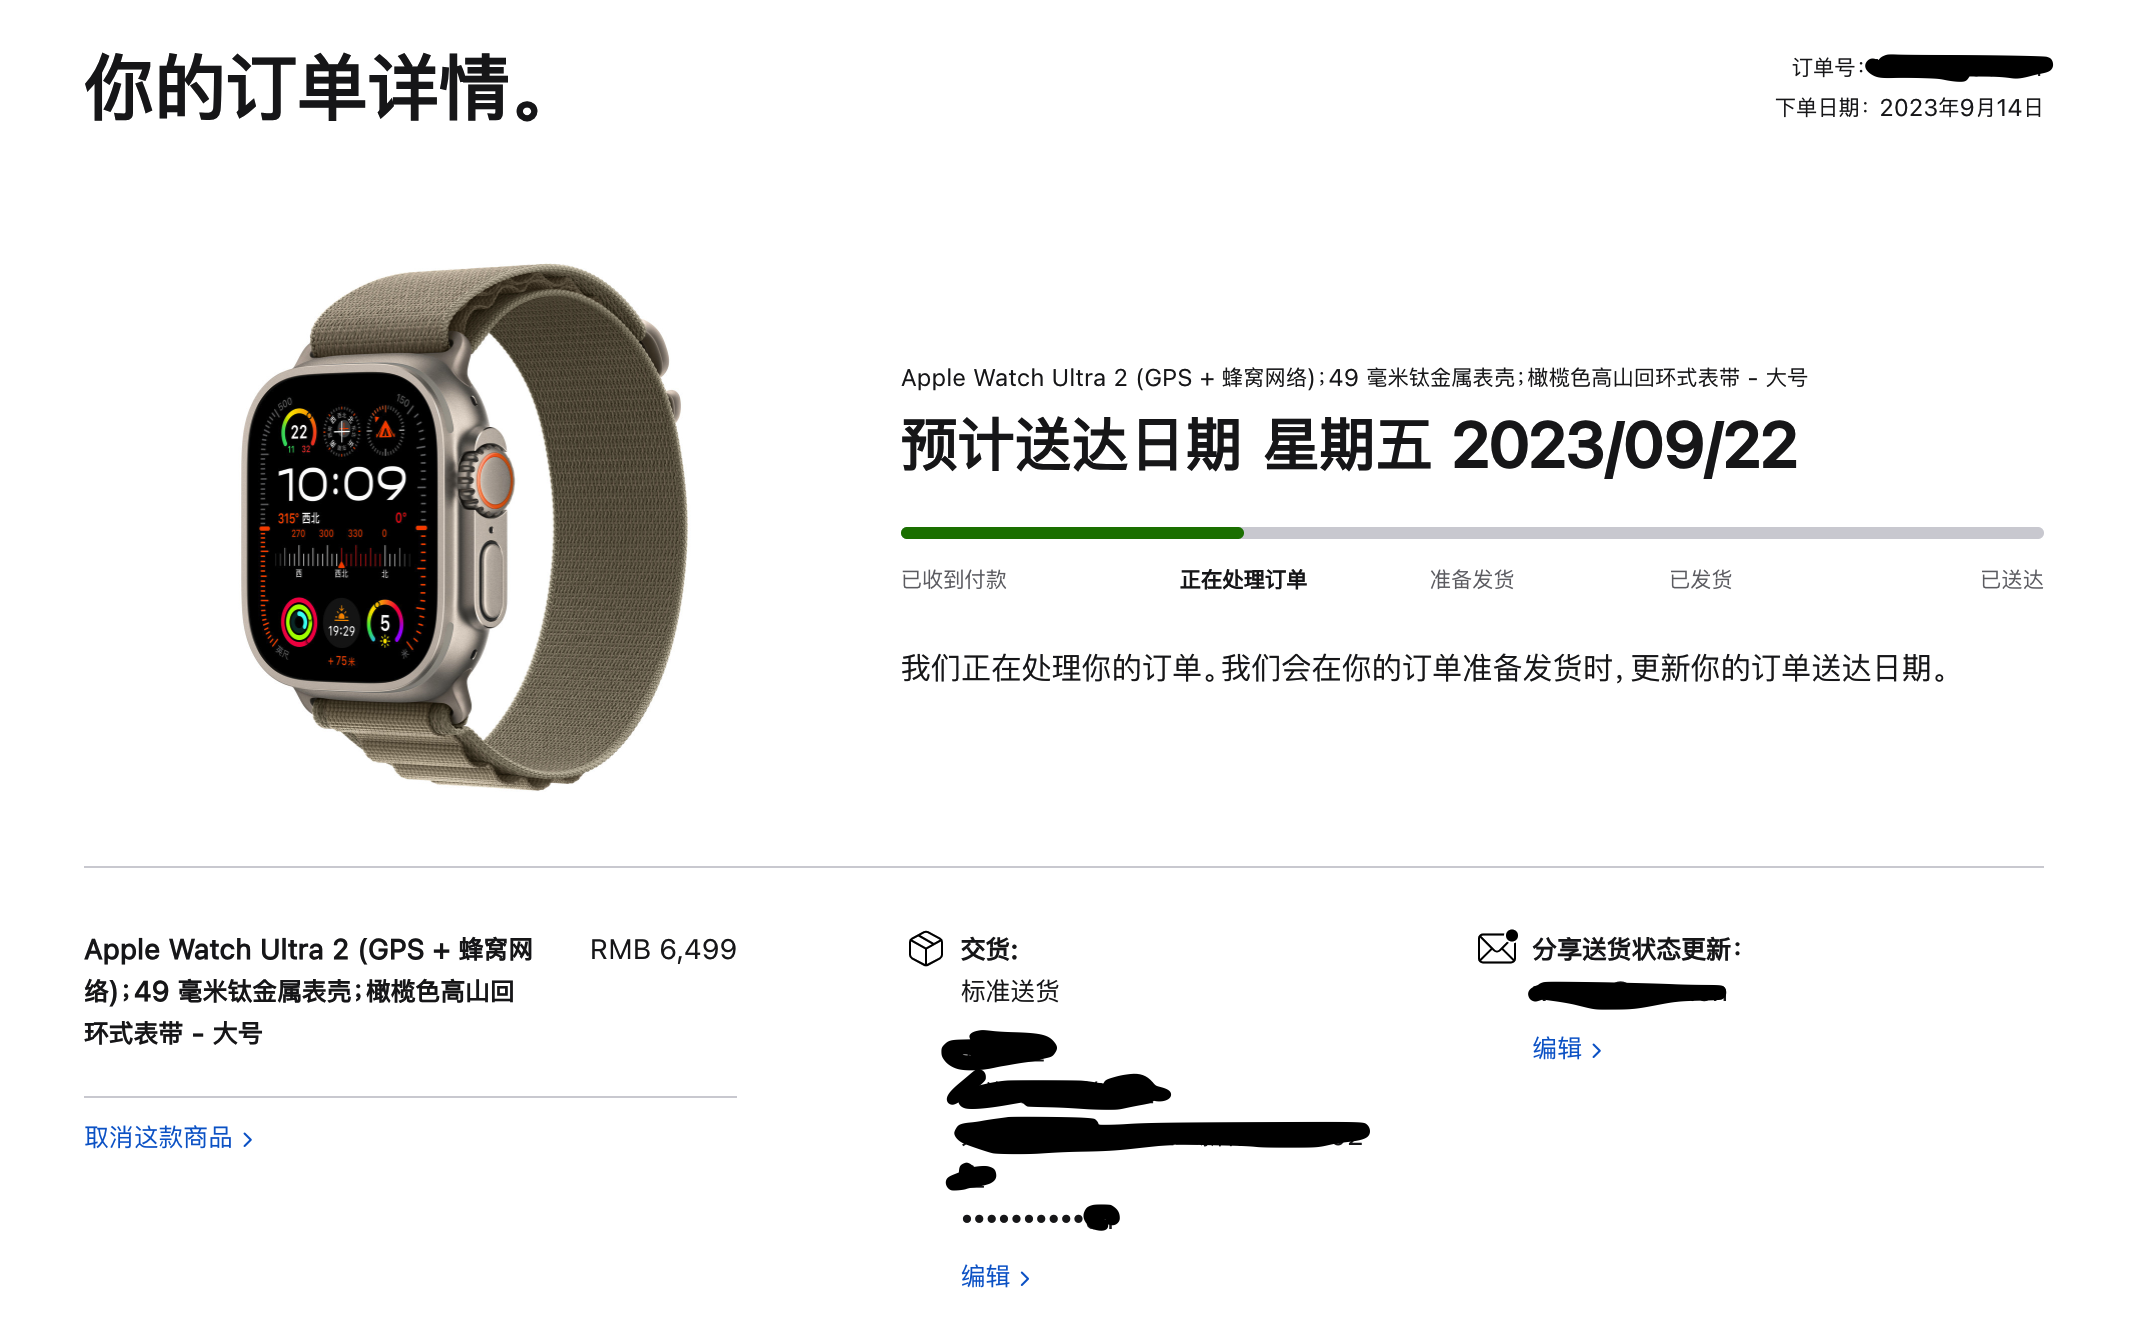 Open larger image: image.png
Next, I will wait to reserve the iPhone at 8 p.m. on Friday night~